DIY SERIES: HOW TO BUILD A BRICK FIRE PIT IN 6 STEPS

Sitting around the fire pit is such a perfect way to spend the evening outside with friends and family. If you have enough space in your yard—ideally, a 10-foot radius all around the location of your pit—then you can create one at home. Building your own DIY brick fire pit is a great way to install this must-have backyard feature on a budget.
A DIY Brick Fire Pit Makes Outdoor Entertaining So Much Easier
Everybody loves sitting around a fire! Instead of setting a fancy table and running around with serving trays, you can relax at your fire pit and focus on enjoying each other’s company. Kids can roast marshmallows, the adults can enjoy some drinks and experiment with campfire cooking, and grandma can cozy up with a blanket on the lounger.
Ready to get started? Here’s everything you need for this easy DIY landscaping project!

DIY Fire Pit Materials and Supplies:
Garden spade
Rubber mallet
Grass marking paint
Hand tamper
1 metal fire pit bowl
Crushed gravel
Leveling sand
Paver bricks
Construction glue or fireplace block adhesive
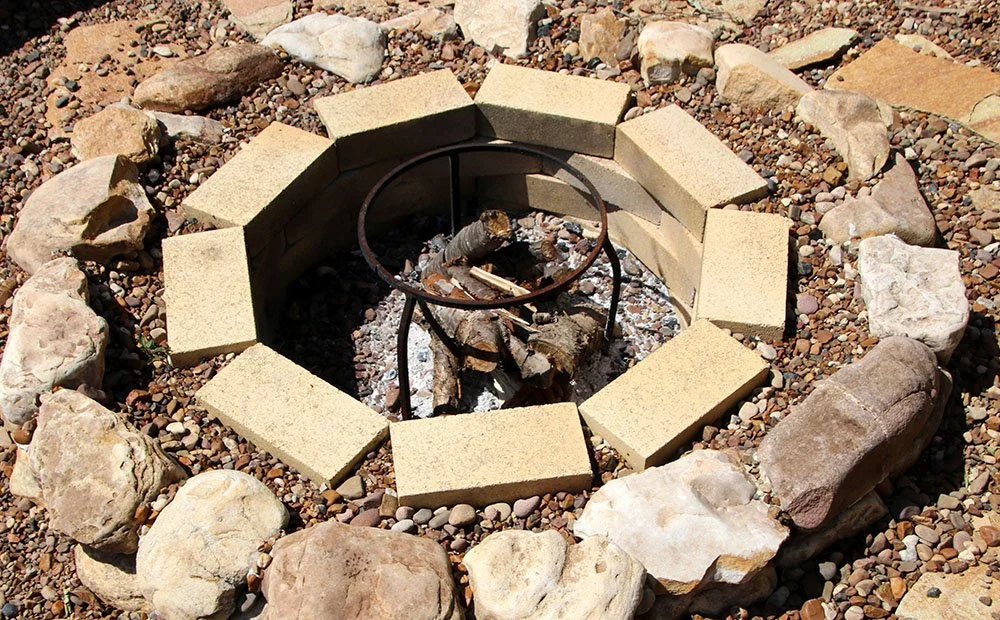
For your bricks, the number you need will depend on your preferred size. You’ll typically need around 50–100 in total. You can use rectangular bricks for a square ring, but if you prefer a circular fire pit, trapezoidal bricks look more stylish and have fewer gaps.
Assembling Your Fire Pit
A fire pit is one of those awesome DIY projects that you can easily complete in an afternoon, but you can use it for many years to come! Not a bad investment, hey?
Safety Note: Avoid placing your pit underneath a leafy tree canopy or anything that could catch fire—bonfires can get tall, fast! Remember to keep that minimum of 10 feet of space all around the pit, away from any fences, walls, or garden beds.
Once you’ve chosen the perfect spot and got all your tools and supplies ready, here’s what you need to do to assemble your fire pit:

Step 1: Mark Where You’ll Dig Out Your Pit
Pick the spot where you want to build your fire pits and arrange your first layer of bricks on the grass. Trace the inner circle or square with grass marking paint and remove your bricks.
Step 2: Dig Your Hole
Using your spade, dig a hole that’s seven inches deep. Make sure it’s level, and the sides are even.
Step 3: Pack Down the Dirt and Add Gravel
Use your tamper to pack down the soil at the bottom of your hole. Add three inches of gravel into the hole, soak it with water from the hose, and then tamp that down, too.
Step 4: Assemble Your First Layer
Arrange the first layer of bricks. If they’re uneven and aren’t level, use a rubber mallet to push them into the ground, or add some leveling sand under shorter bricks.
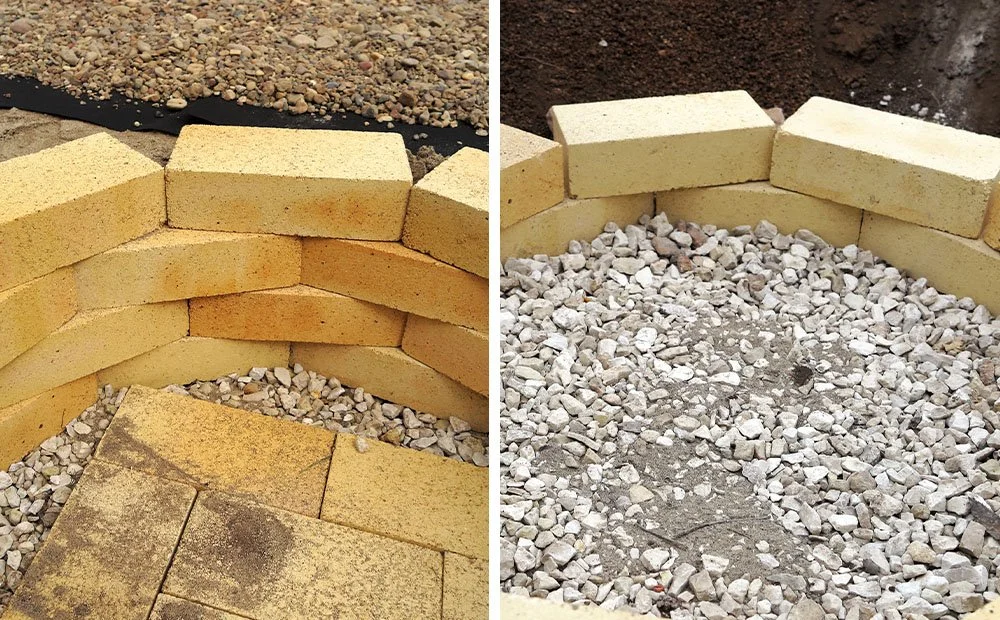
Step 5: On to the Second Layer
Put the second layer of bricks into place and stagger their position so the joints are offset. Place your metal bowl on top to ensure that it fits properly, and make adjustments if needed. If it fits well, remove the bowl and glue your bricks into place. Be sure you’re using an adhesive that’s suitable for stone and can withstand high temperatures.
Step 6: Add the Remaining Layers
Keep stacking and gluing! With each layer, place the fire pit bowl on top to ensure it fits properly. Four layers of bricks should be enough, but you can add more if you like. Once it’s done, let the glue dry out thoroughly before starting any fires!
Need any supplies or outdoor decor to properly enjoy your DIY fire pit in Indiana? Visit Dammann’s Garden Company, and we’ll get you set up with all the backyard bonfire essentials!